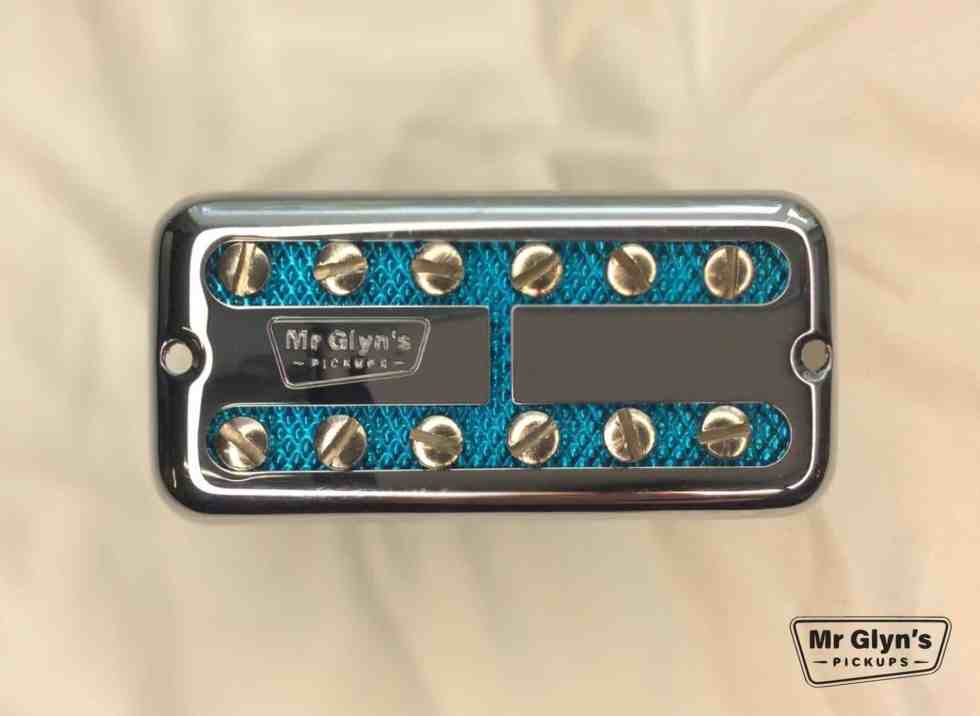
Little Dreamer – brown sound humbucker: NZ$219 for NZ customers, if you’re overseas it’s GST free; NZ$190.43
Cover NZ$20 ($17.39) extra
Only available in Bridge: 14.3 kOhms Alnico II
The Little Dreamer – brown sound humbucker is a tribute to the great Edward Van Halen’s guitar sound. The brown sound, as he called it, has been a huge influence on many players. The bass is full and pushy, treble smooth but the real character is in the lower mids. It’s a smooth tone and in the hands of the master sounded like liquid.

Table of Contents
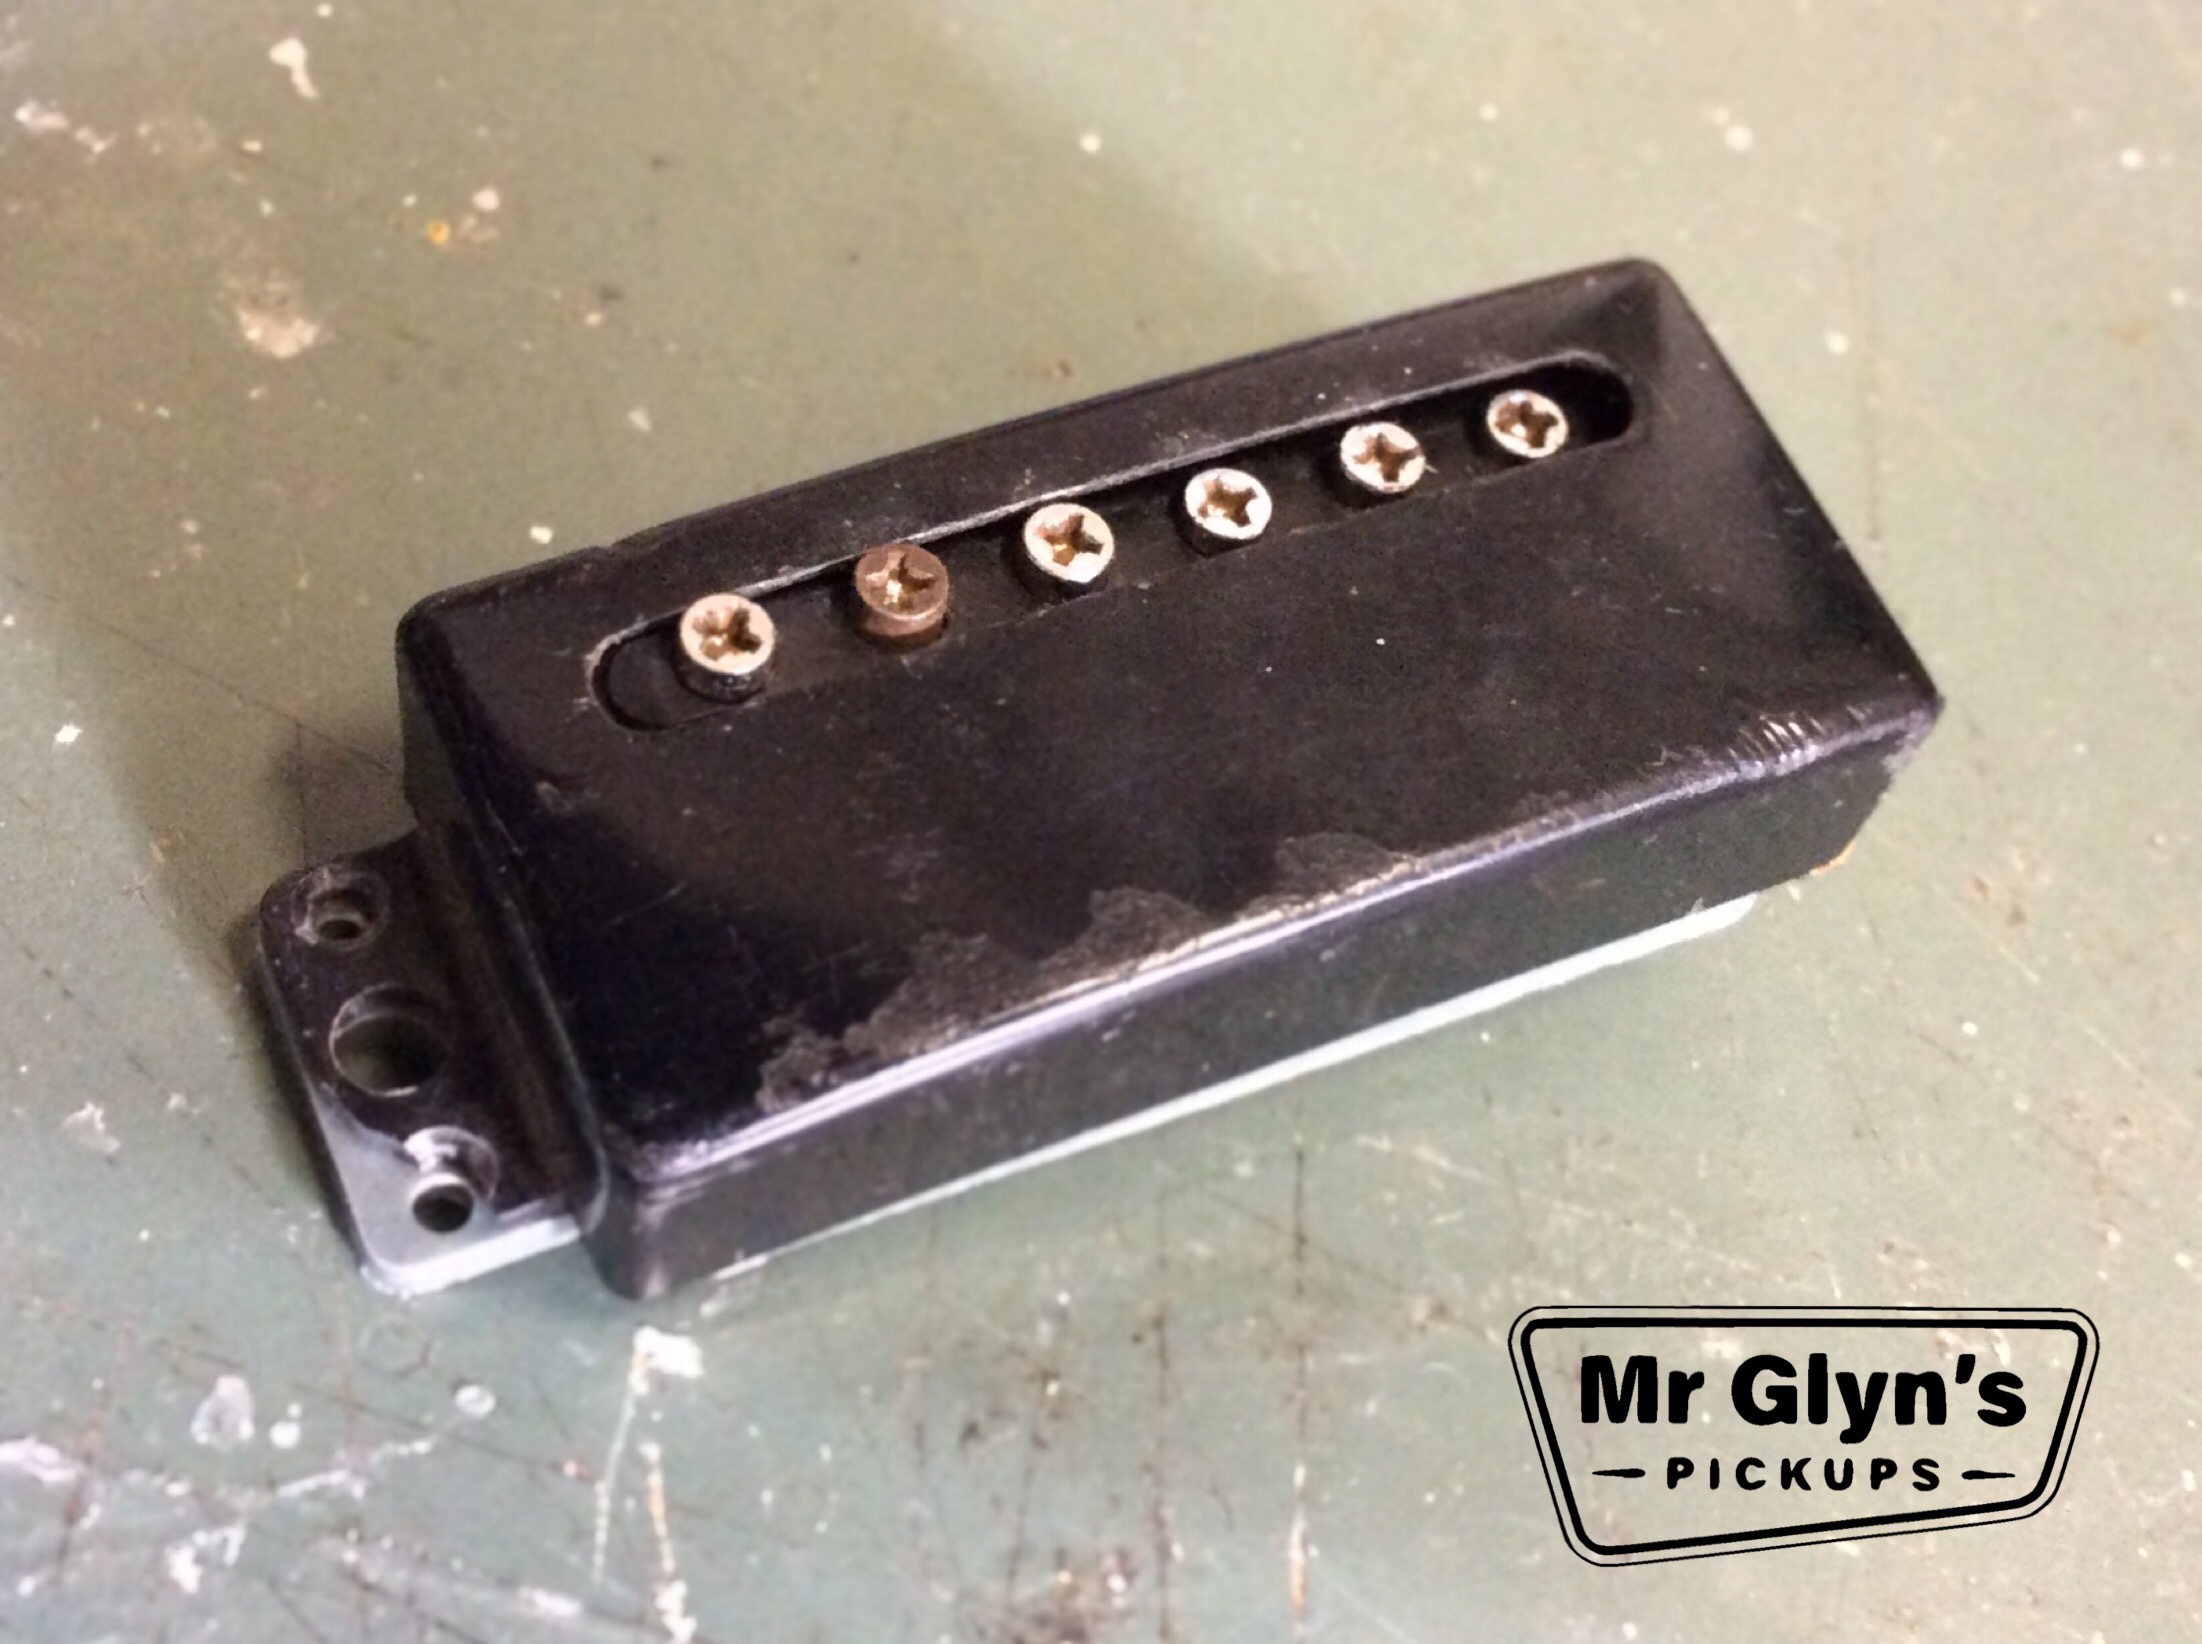
The Little Dreamer pickup is my take on a pickup Ed talks about modifying in an interview with Jas Obrecht for Guitar Player magazine. The interview took place in late 1979 and was published in April 1980. Ed talks about taking a Di Marzio Super Distortion and swapping the magnet from ceramic to alnico II. It is this era I wanted to capture.
Super Distortion Pickups have a single ceramic magnet. Not only is ceramic more powerful than alnico but this particular magnet is almost twice the size of a conventional humbucker.
Ceramic magnets are powerful and have a pronounced treble and bass push. They often sound scooped in the mids. Alnico II is considerably weaker and has a more even response. I can see why this was a better choice for what he was trying to achieve.
This pickup will not make you sound like the great EVH, so much of that sound was in his hands. But it is an important link in the chain. I think of it as a jigsaw puzzle, this is just one piece. There are many factors that go towards this distinctive tone with the pickup being just one of them.
It’s not just for Van Halen sound-alike players either. This is a great tone on which to play all kinds of music. It’s a smooth, responsive rock humbucker and it reacts very well to volume changes. The brown sound can be a useful part of many players’ arsenal.
Little Dreamer – brown sound Development
I am often asked which pickup from my range will get closest to the EVH tone, the legendary ‘Brown Sound’. I have always recommended my ‘Cloud Nine’ humbucker. The Cloud Nine does get close but it is a little bit more punchy with clearer mids than would be ideal.
So I started with the Cloud Nine as my base line design and modified from there.
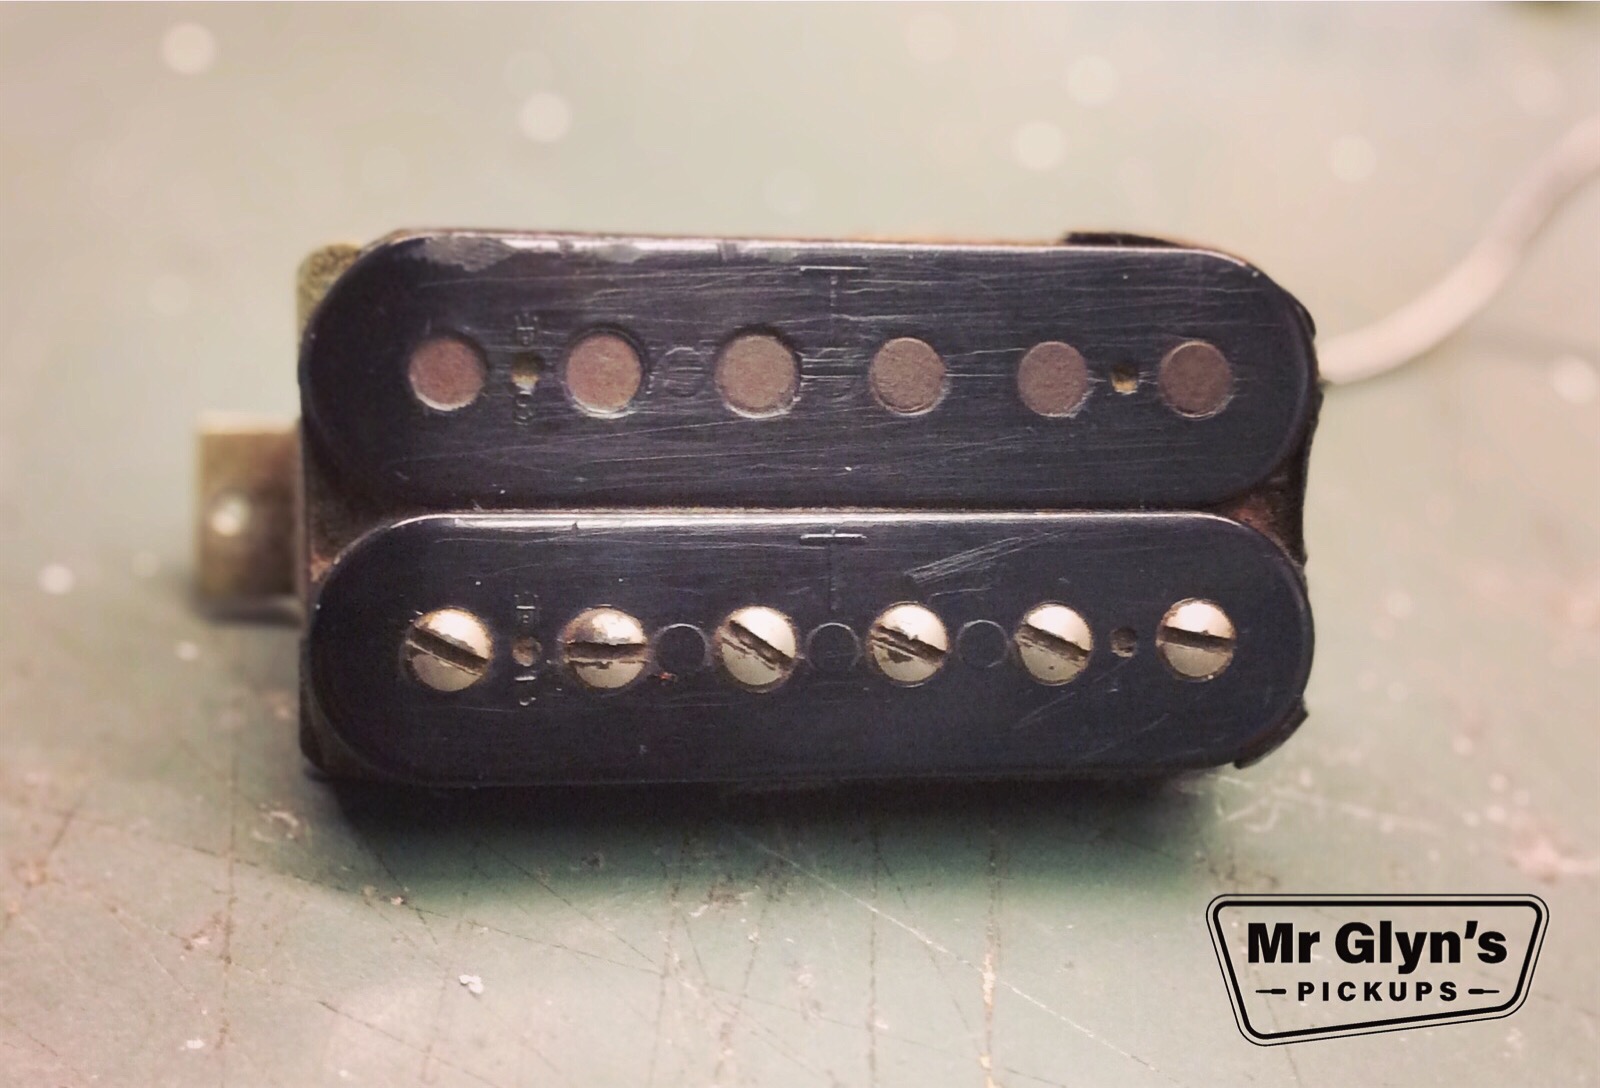
Firstly I wound symmetrical coils to focus the mid range. The Cloud Nine has asymmetric winds and so it has open, clear mids. That is achieved by each coil having a slightly different resonant peak. Symmetrical coils like with the ‘Little Dreamer’ focus the resonant peak more. I needed a focused mid range for the brown sound.
That helped a little but the big change was when I tried an Alnico II rough cast magnet. Alnico II has a lot less power and punch than Alnico V. It has a very even response across the frequencies which emphasizes the mid frequencies.
This got me into the ball park so then it was a case of tweaking the windings until I was there.
Like with all my pickups I tried it in multiple guitars and in many situations, especially at gigs.
I am never in a hurry, I intend to stand by this design for the rest of my life so it needs to be right.
Demo
Thanks to Leon Todd for this great demo.
The Little Dreamer is available in 49.2mm and 52mm pole spacing. Here is some info on pole spacing and which is right for you.
Description
Here are my thoughts on the design of this pickup.
The windings are only part of the picture. The rough cast alnico II magnet is a very important factor. It’s this magnet that keeps the treble warm and smooth and the mids present in the mix. It’s quite a balancing act keeping the proportions just right. Retaining both warmth and clarity in the lower mid range is essential to achieve this great tone. There’s a lot to getting the brown sound right.
Suggested Wiring Diagram
Here is how to get the most out of your Little Dreamer pickup. Consider the wiring set up used by the master himself. He used just a single 500K Ohm volume pot with no tone control. Removing the tone from the circuit makes a very small difference but every little counts. It is especially noticeable at higher volume.
This is not essential and it works as well as any other humbucker with a tone control.
Here is my suggested wiring diagram:

The Little Dreamer is available in 49.2mm or 52mm pole spacing. Here is some info on how to find out which you need.
My History With Van Halen
I initially came across Van Halen in the early 1980’s. My first album was ‘Women And Children First’ and what I loved were the guitar grooves more than the lead playing.
If all you have paid attention to are the flash solos, take a look at this breakdown of the track ‘Take Your Whiskey Home’. Danny Eddy analyses the groove in detail and will hopefully increase your appreciation of how great Eddie Van Halen really was. For me it has always been the groove.
I got to see Van Halen live at the Castle Donington show in August of 1984. It turned out to be one of the last shows with Dave Lee Roth of that era. Of course, we didn’t know that at the time.
Eddie Van Halen is arguably the most influential electric guitar player of all time. He was a relentless experimenter and tinkerer, constantly pulling apart his gear – looking for that perfect tone.
In an interview in 1978 just after the release of their first album he said: “There is a difference between being just loud and having what I call a warm, brown sound, which is a rich, toney sound.”
And so he gave the guitar world a new descriptive term for tone.
The development of the Little Dreamer -brown sound pickup really started at my first listening to the Women And Children First album. That tone got stuck in my head.
Enjoy this? You may also like…