Posted on Leave a comment

Yamaha SA30 pickup

Vintage Yamaha humbucker

This Yamaha SA30 pickup came to me for repair the other day and I decided to take some photos and share my thoughts on it with you.

Yamaha SA30 pickup - Mr Glyns Pickups

The Yamaha SA30 is becoming a bit of a legend and getting rather sought after. Gone are the days you could pick one up cheap – the word is out. Thank you internet 🥴.

If you don’t know about them here’s some info: https://tymguitars.com.au/blogs/blog/1966-yamaha-sa-30t
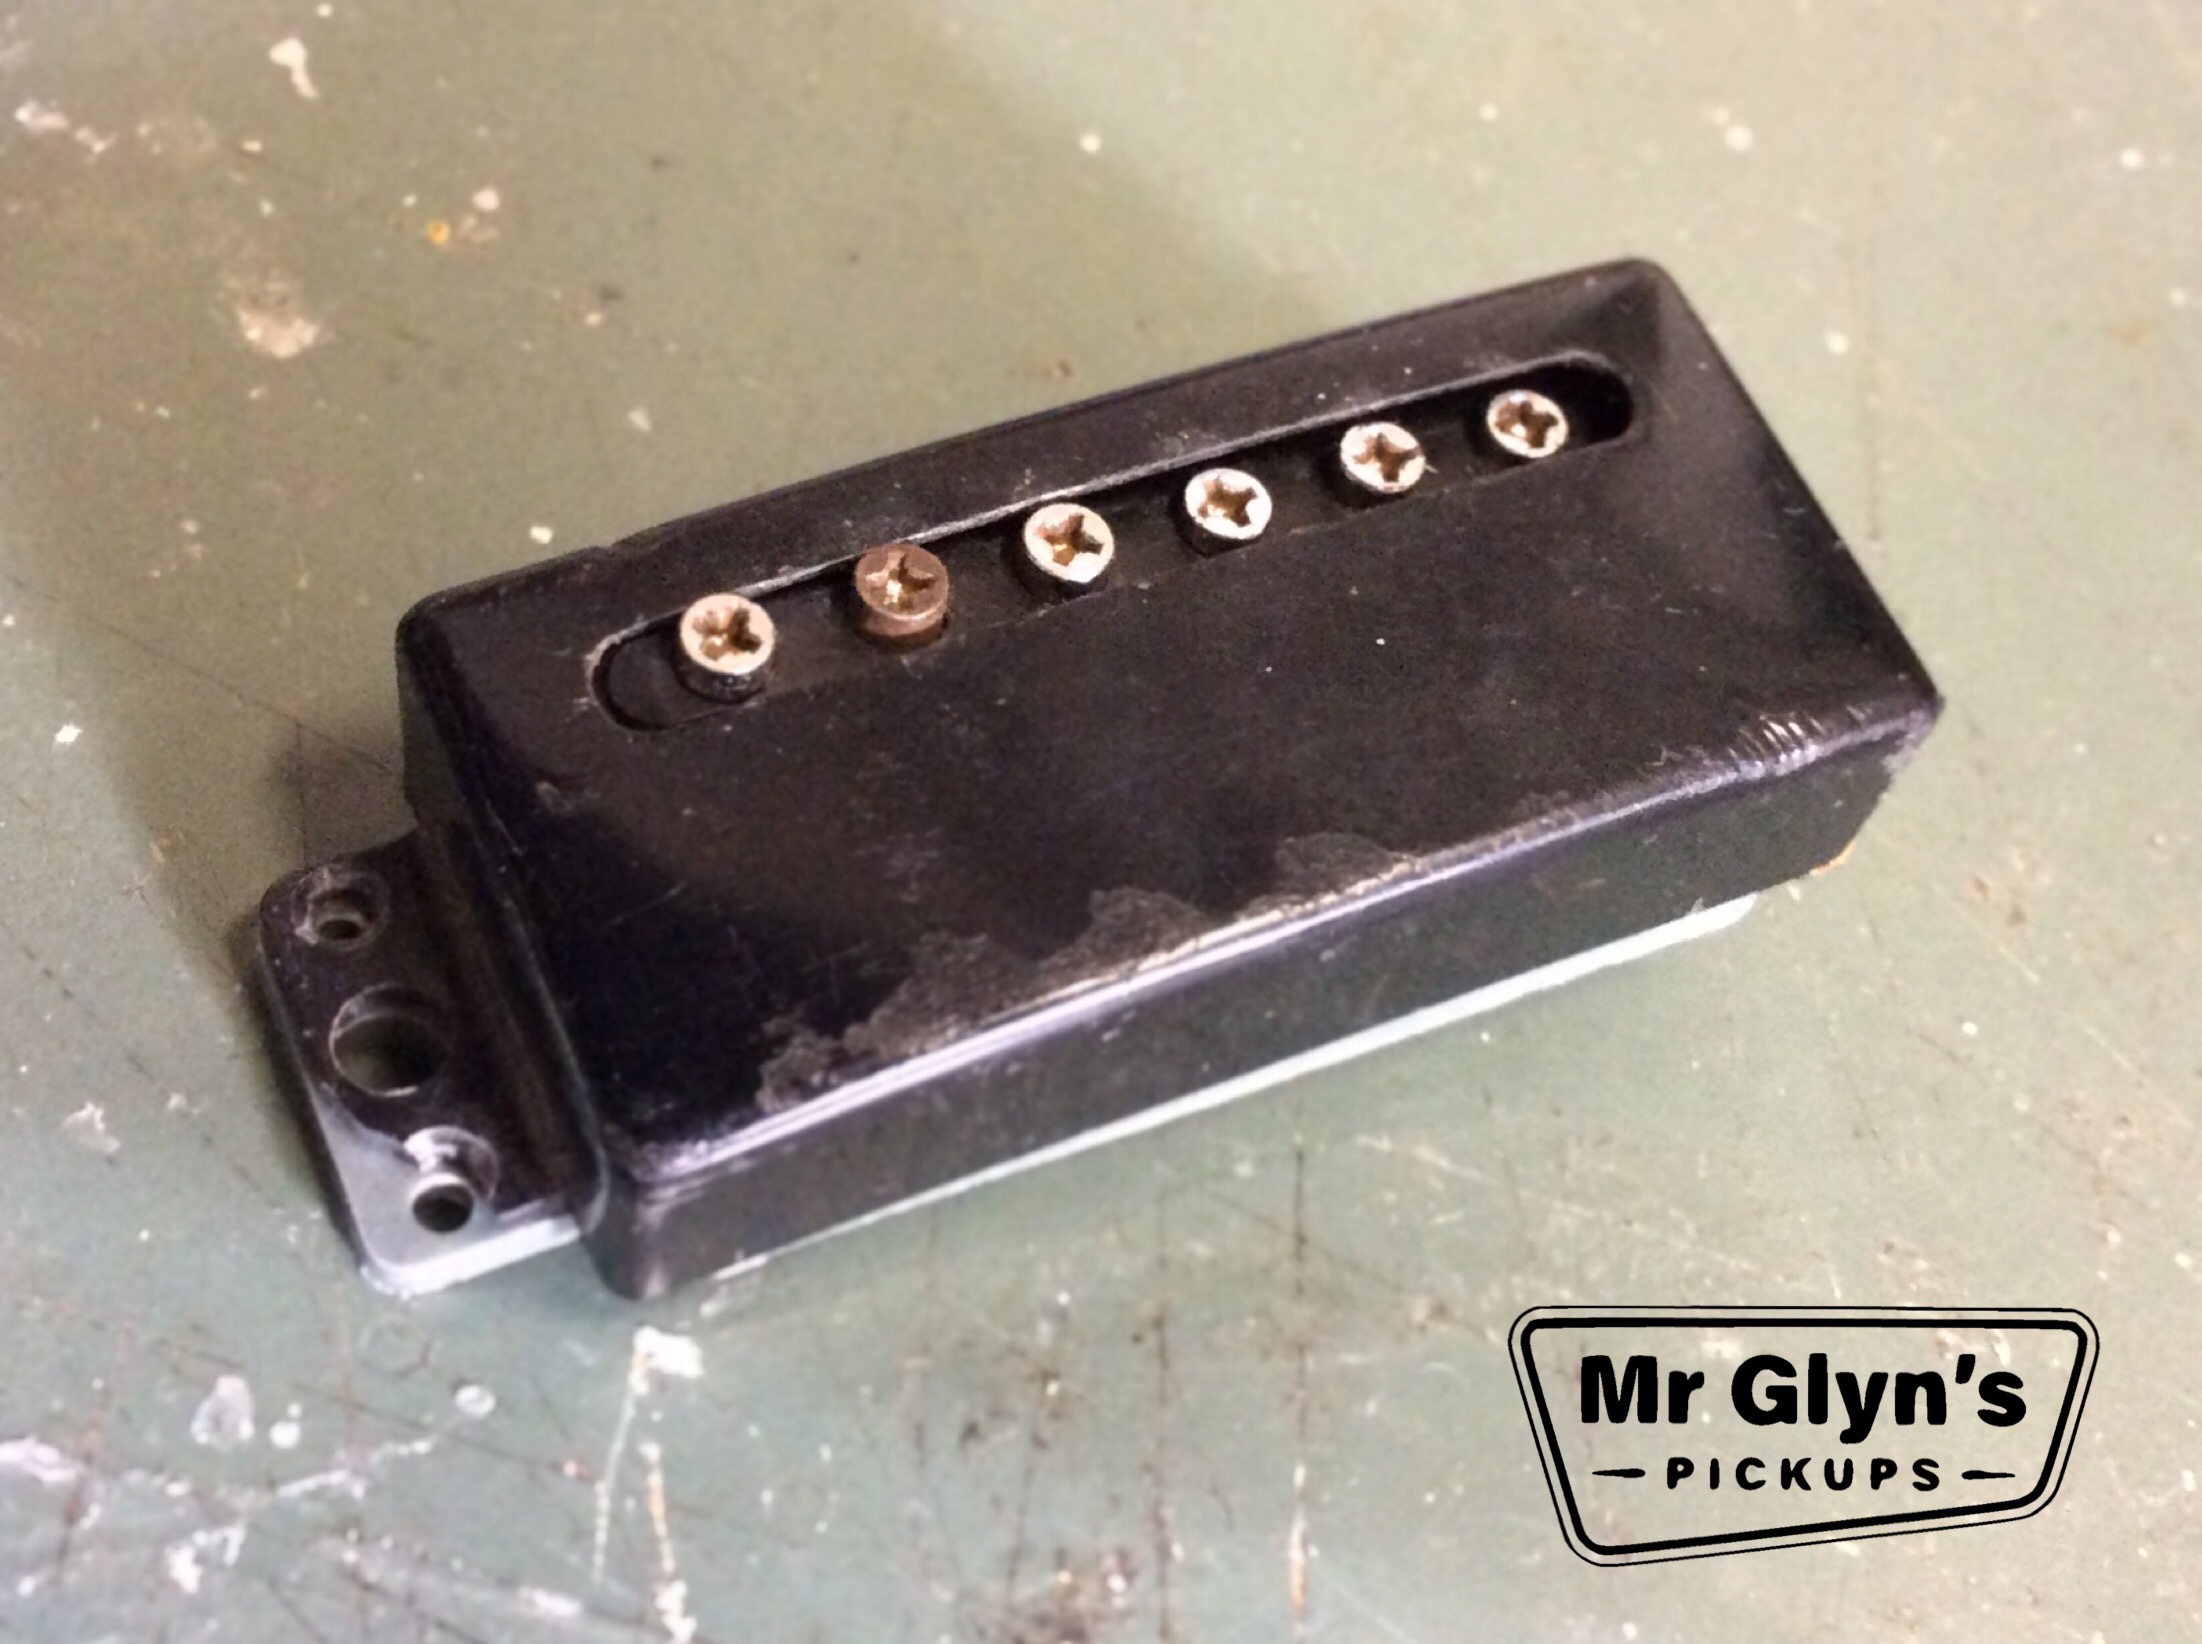
This pickup was sent to me with an intermittent fault. It would work if you tapped it but stop a minute later. That pointed towards it being an internal wiring fault rather than a broken coil, I needed to investigate.

Yamaha SA30 pickup - Mr Glyns Pickups

With the cover off you can see the hook up wires – these were my number one suspects. Sure enough, there was a dry joint where one of them was soldered to the connectors on the base plate. Just to make sure I re- soldered all the joints and the pickup is fixed.

But that’s not the interesting part – look at those bobbins. They’re different sizes. They each measure in the 4.5 K Ohms range but they’re clearly wound with different gauge wire on each coil. These pickups are renowned for their clarity – so what’s going on?

The smaller coil on the left must be wound with thinner gauge wire and less of it than the one on the right. Thinner wire have a greater resistance for the same length.

The coil on the right looks like a conventional humbucker coil like an overwound PAF but the coil on the left would have a less full sound. It will have less bottom and lower mids and a lot less power. But that’s just the windings.

bobbins - Mr Glyns Pickups

Turn the pickup over and you can see a ceramic bar magnet but it’s how it connects to the poles that’s interesting. The bigger coil has a larger piece of steel coupling the poles to the magnet than the smaller coil. Measuring the strength of the magnetic field on the top of the poles the smaller coil is about 20% weaker. So this again gives the big coil an overwound PAF sound and the smaller coil still thinner.

 - Mr Glyns Pickups

So with the Yamaha SA30 pickup they’ve created that clarity by having one coil doing most of the work – 4.5k Ohms with a ceramic magnet has a bit more grunt than one half of a PAF. But the other coil on it’s own would have more of a weedy gold foil type sound. Then they’ve been combined in series as a humbucker. Smart stuff eh!

Feel free to contact me for pickup repairs or for a chat about my range of new pickups. mrglynspickups@gmail.com

And here’s a great site for all things Yamaha SA, heaps of information here https://www.thesupposedstringmeister.net/?page_id=644

https://mrglynspickups.com/

https://www.youtube.com/c/MrGlynsPickups/videos

Mr Glyns Pickups  Roboguy Logo

Posted on Leave a comment

Gold Foil Pickup re-wind

A Gold Foil Pickup is not for everyone or for every situation. They are low powered with no shortage of high end.

Gold Foil repair
Tokai Gold Foil

This Gold Foil Pickup came to me with the coil reading ‘open circuit’ on the meter so it was likely it would need re-winding. It’s a Tokai from the 1960’s

You never know what you’ll find inside these.

Gold Foil repair
Gold Foil Pickup

Under all that gold and chrome there is a very scruffy little coil wound directly around a ceramic magnet. There isn’t a bobbin which makes it rather tricky to work with.

I never just re-wind a pickup without testing all the connections first just in case it was just a dry joint. This time it paid off, one of the connections had failed. The repair turned out to be fairly simple.

Pickup Repairs

Pickup re-winds are a big part of what I do.

In the early days back in the 1990’s I re-wound a lot of pickups. It was an invaluable introduction into the inner workings of electric guitar pickups.

Back then there were a lot of 60’s and 70’s quality pickups around to practice on, they weren’t as valuable or sought after as they are now. Because of that I got to see how pickups were put together in the old days, the construction, the potting material…

There wasn’t much information available so experimentation was the only way to learn. I made so many bad pickups back then but made a note of every single one, how I’d wound it and what the result was. By using that method I got closer and closer to what I wanted. I also made a note of all the re-winds I did and the original spec if I could get it. I’m still writing in that note book to this day and it’s becoming a fantastic reference tool when I receive an unusual pickup repair from a customer.

I still really enjoy re-winding pickups, I think I have a strong instinct to fix things. I would much rather repair a faulty old pickup than sell a customer a new one. Sometimes, of course, the customer wants a different sound that the old pickup can’t give them and a new pickup is the way to go.

Please feel free to contact me about any faulty pickup by email (mrglynspickups@gmail.com) or by phone (021 912 678).

https://mrglynspickups.com/

https://www.youtube.com/channel/UCcDggiRTQyFec5KAVHsC2xA

Mr Glyns Pickups Roboguy

Enjoy this? You might also be interested in…

Posted on Leave a comment

Seymour Duncan JB Re-Wind

Seymour Duncan JB humbuckers are such a classic pickup, loud and aggressive with no shortage of high end attack. This particular one has had a hard life and finally gave up so it arrived at my workshop for repair. It’s not the first Duncan JB Re-Wind if had to do but this time I’ve taken some pics.

Seymour Duncan JB repair

This one had stopped working altogether. With the tape off the hook up wires are exposed and it’s possible to identify which coil has the problem. It’s usually just one coil.

Mr Glyns Pickups repairing a JB

It turned out to be the coil with the screws in this case.

Duncan JB repair

The coil with the lugs in fine and showing 8.42KOhms and from that I can figure out what size wire they used and calculate the number of turns needed to re-wind the duff coil.

Pretty routine stuff this Duncan JB Re-Wind but always nice to have a look inside a classic pickup. https://mrglynspickups.com/

https://www.youtube.com/channel/UCcDggiRTQyFec5KAVHsC2xA

Pickup re-winds are a big part of what I do.

In the early days back in the 1990’s I re-wound a lot of pickups. It was an invaluable introduction into the inner workings of electric guitar pickups.

Back then there were a lot of 60’s and 70’s quality pickups around to practice on, they weren’t as valuable or sought after as they are now. Because of that I got to see how pickups were put together in the old days, the construction, the potting material…

There wasn’t much information available so experimentation was the only way to learn. I made so many bad pickups back then but made a note of every single one, how I’d wound it and what the result was. By using that method I got closer and closer to what I wanted. I also made a note of all the re-winds I did and the original spec if I could get it. I’m still writing in that note book to this day and it’s becoming a fantastic reference tool when I receive an unusual pickup repair from a customer.

I still really enjoy re-winding pickups, I think I have a strong instinct to fix things. I would much rather repair a faulty old pickup than sell a customer a new one. Sometimes, of course, the customer wants a different sound that the old pickup can’t give them and a new pickup is the way to go.

Please feel free to contact me about any faulty pickup by email (mrglynspickups@gmail.com) or by phone (021 912 678).

Enjoy this? You may also be interested in…