The ’72 Fender Mustang Bass Pickup appears to be a budget model but there’s more. Leo Fender cared about his products and everything was thoroughly thought out.
Table of Contents
Some of history
I get to repair old pickups as well as make new ones. When I was sent this old Mustang Bass Pickup I thought it was worth taking a few pics and writing about it.
This was the last bass designed by Leo Fender before he sold Fender to CBS in ’65. This pickup shows all the thought and consideration you would expect from the great man. It’s easy to dismiss pickups on ‘budget’ guitars but there’s a lot more to this one than meets the eye.
The later version of this instrument, the Musicmaster Bass had a single coil pickup straight out of a Stratocaster – yes really. Here is more on the Musicmaster bass pickup. I make my own version of the Musicmaster bass pickup in two flavors.
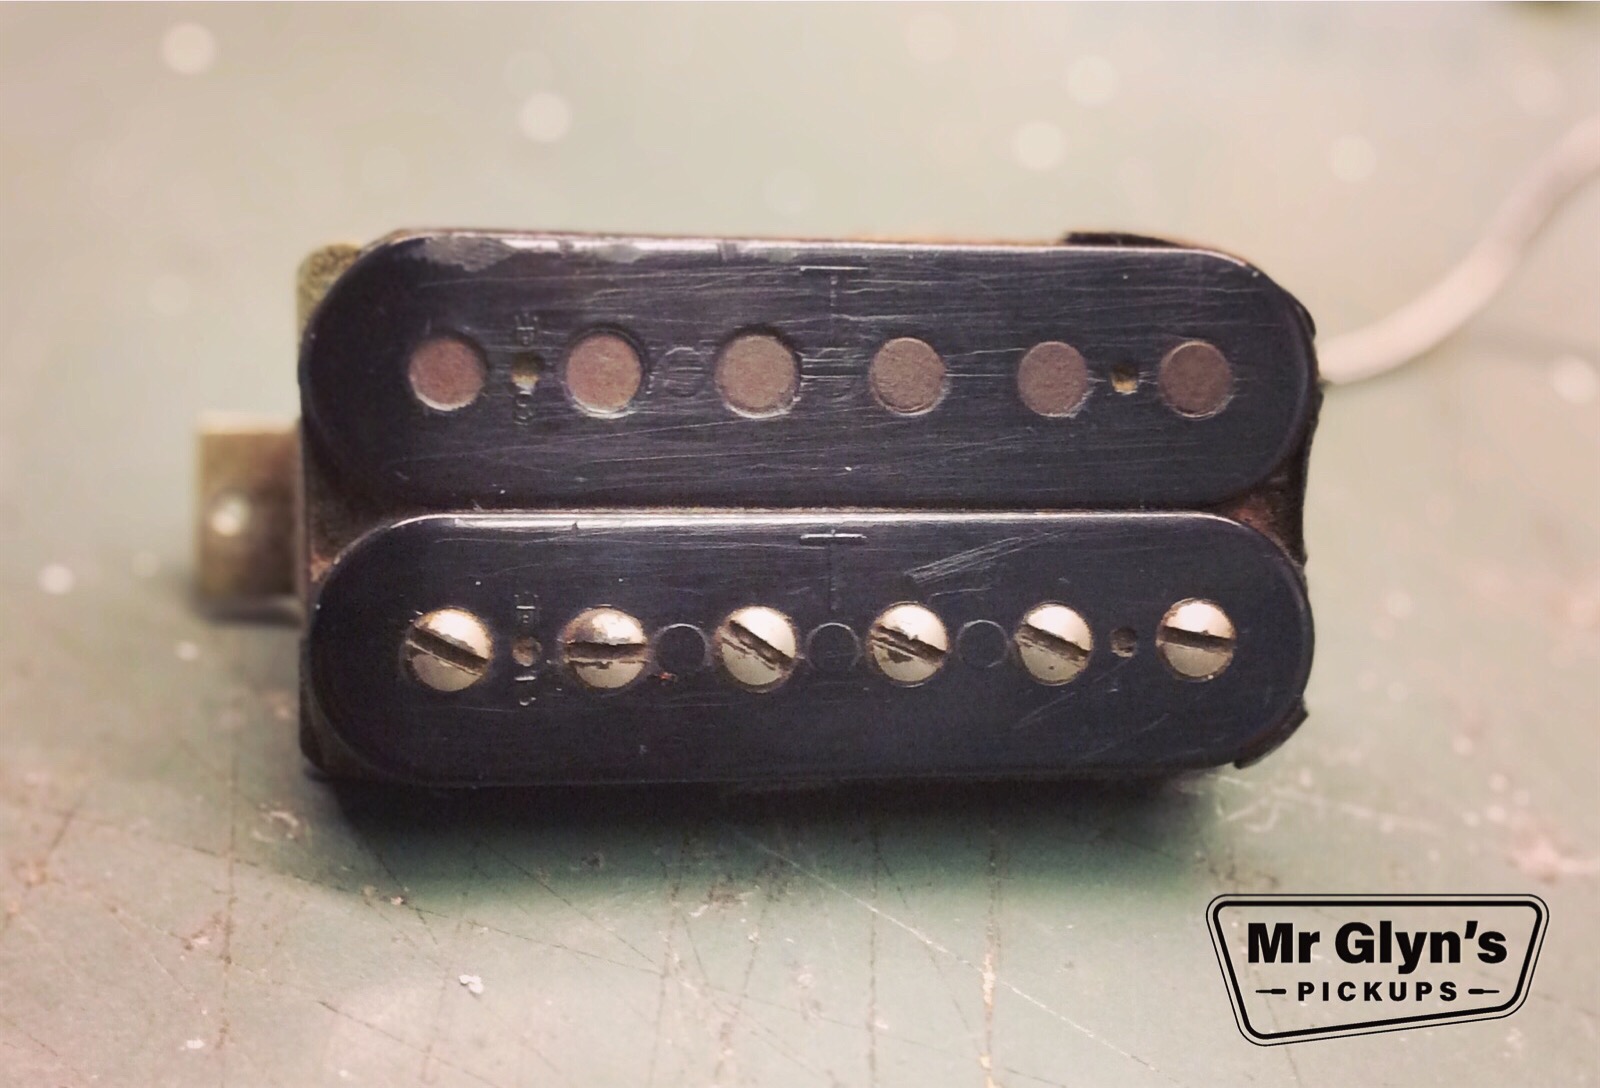
The original Mustang bass pickup that I have here is a split pair, like a precision bass pickup but with a few essential design differences.

What makes the Mustang Bass Pickup great
The obvious thing is that it’s smaller, but there’s a good reason for that.
The Mustang is a short scale bass, 30″. With a shorter scale comes less string tension and a much boomier sound with less percussive highs and a fatter bottom end.
So why didn’t he just use P Bass pickup?
It’s obvious from the design of the Mustang Bass Pickup that the intention was not to just knock out a cheap student model but to make a great instrument only with a shorter scale.

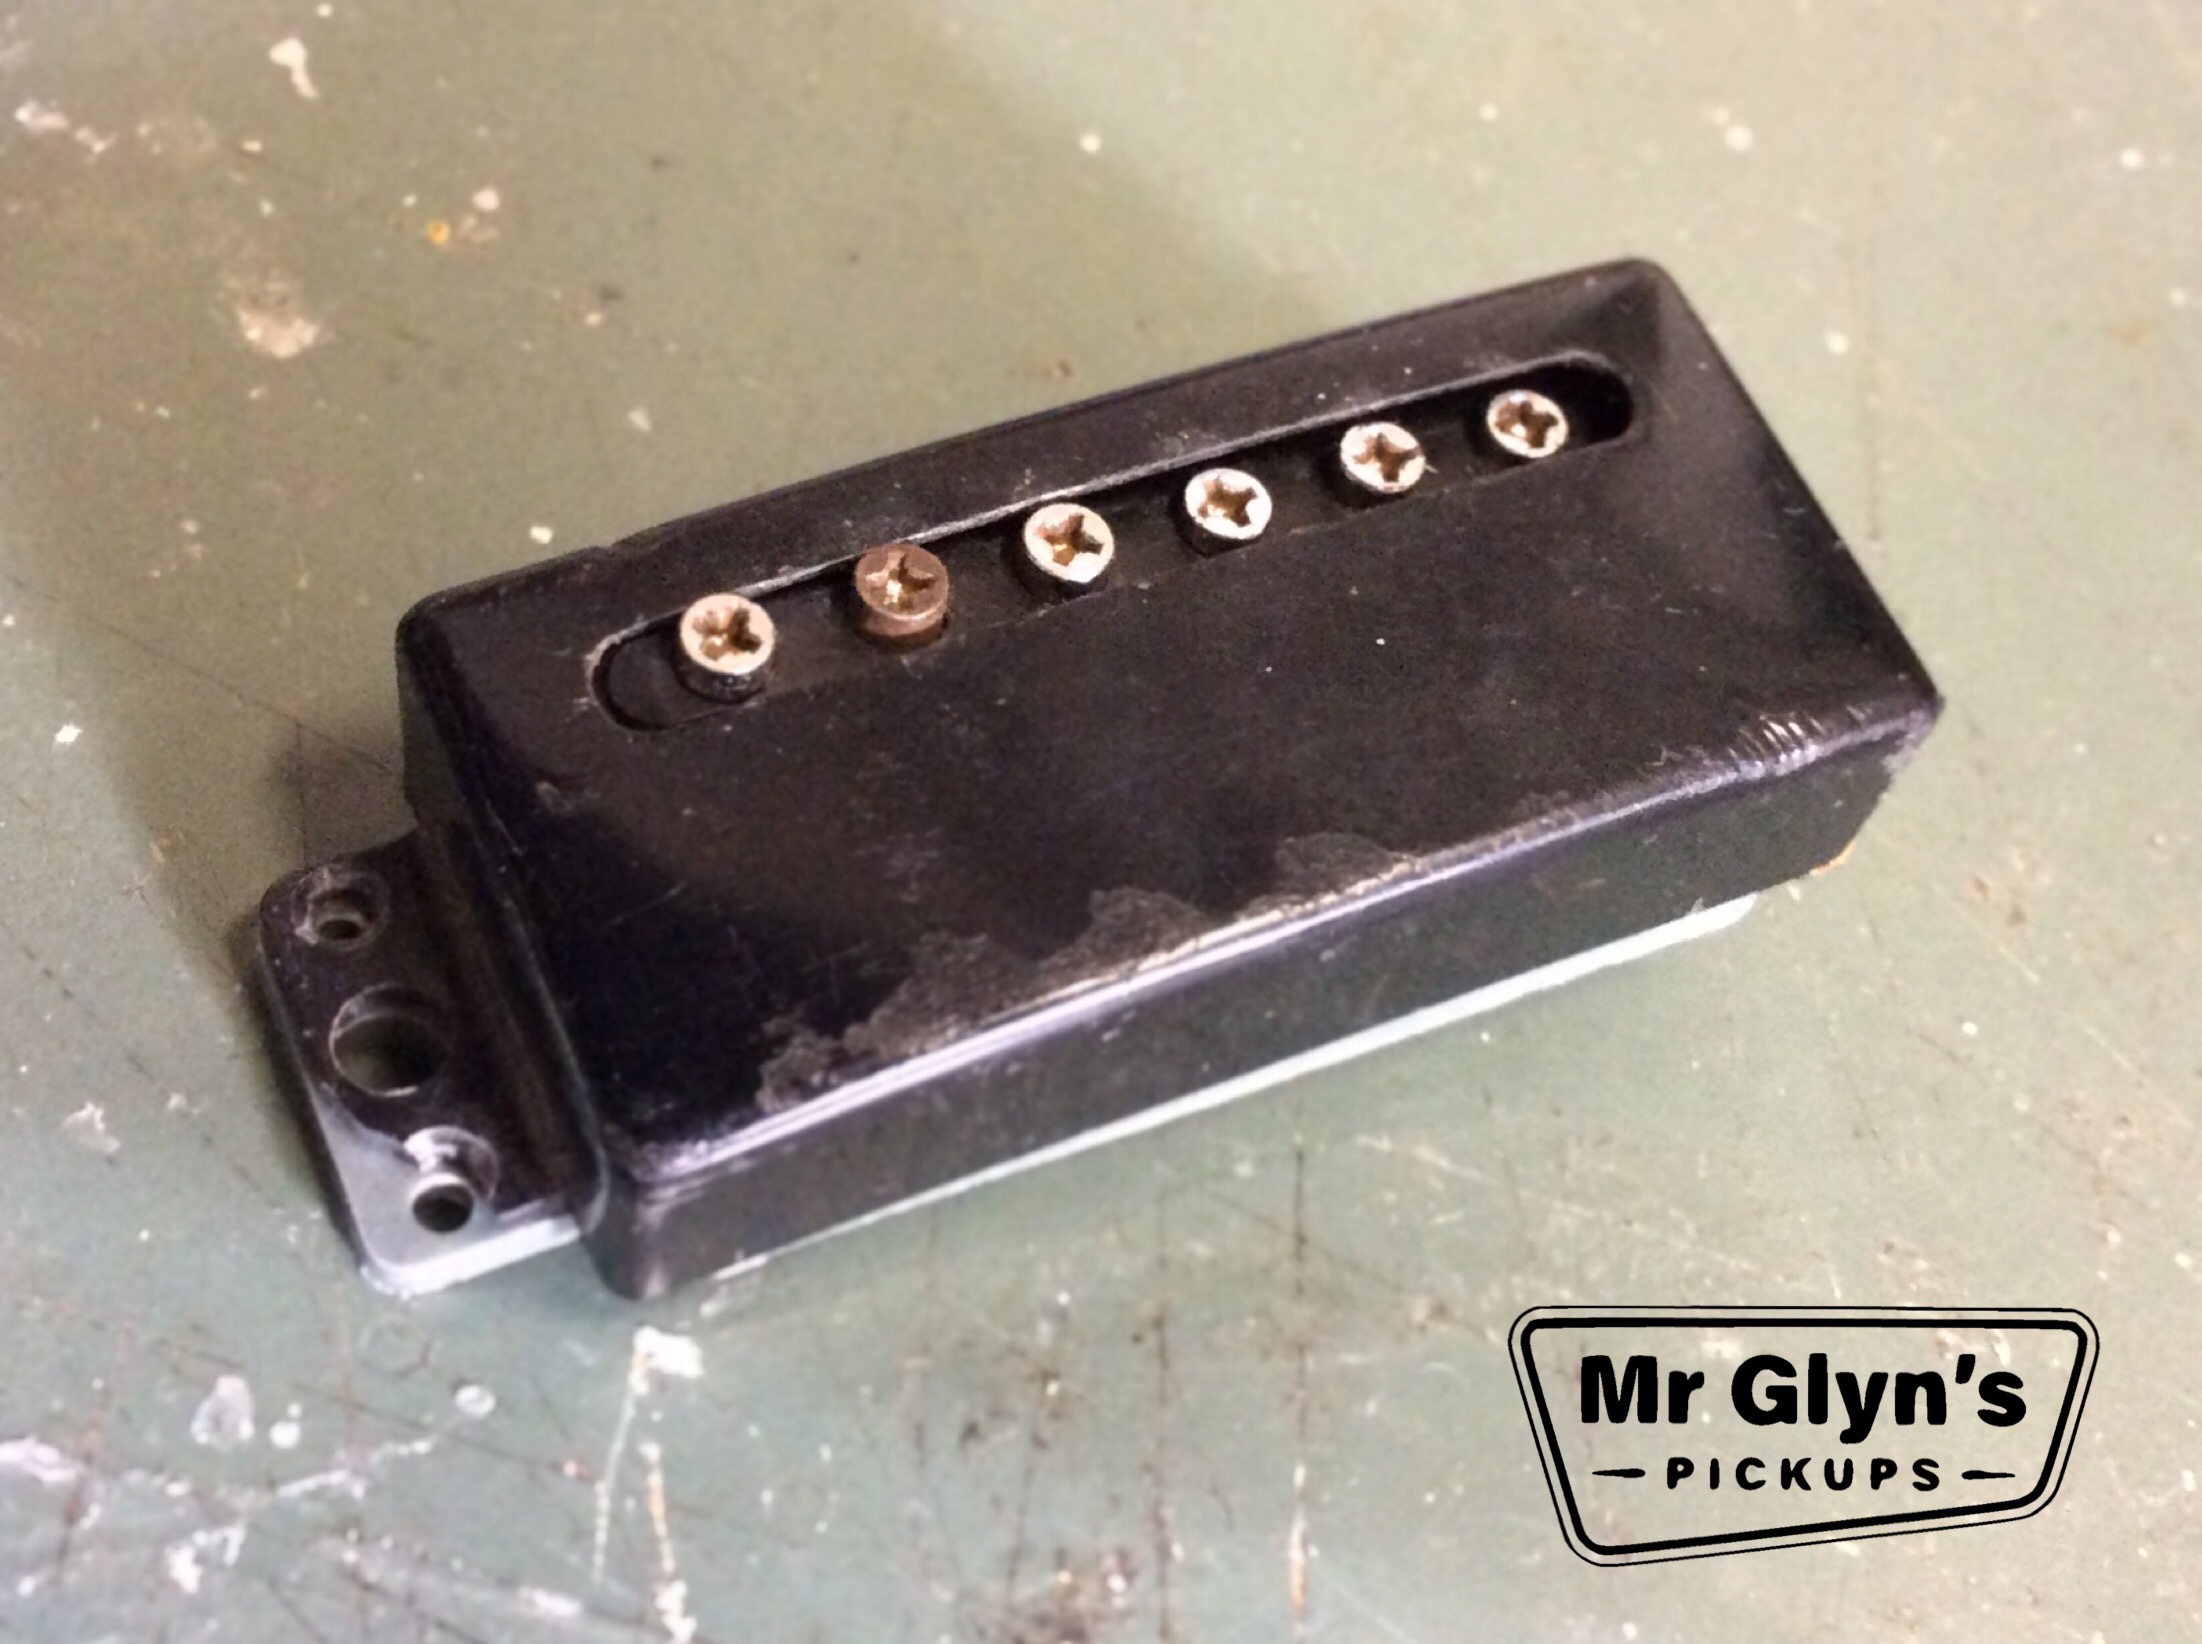
You can see that the magnets are protruding out of the bottom of the base plate – they’re 24mm long alnico 5 magnets. P Bass magnets are around half that length. Bigger magnets means more pull on the string and more punch to the attack of the note.
The distance between top and bottom plates is greater on the Mustang than the P Bass. This gives a much taller pickup. With a taller pickup more of the windings are closer to the magnet. A P Bass’ windings can get a lot further away from that magnetic field by the time you get to the outside turns.
Windings closer to the magnet gives a sharper, more percussive mote than the mellower P Bass.
With roughly the same turn count between P Bass and mustang this means the Mustang’s footprint is smaller.
Both those factors – coil geometry and magnetic pull are specifically designed to offset the lack of definition you can hear in a short scale bass.
This was not the easiest path to take. The magnets would have to have been specially made and the flatwork (top and bottom plates) would have been made specifically for this model. Not least there would have been molds made to injection mold the covers.
It was all about getting the best possible sound from a short scale bass while make the price accessible to more musicians.

It’s a clever design.
Five years later when CBS were running Fender they introduced the same bass but with a Stratocaster (yes, 6 pole) pickup. Now that was taking the easy route. Leo Fender always did things the best way he could, working up to a standard rather than down to a price.
If you’re interested in Leo Fender read Forrest White’s book, he was there.
So back to the Mustang Bass Pickup repair
As you can see from the color of the winding the wire has plain enamel insulation. The insulation does make a difference. Not all insulation is the same thickness. Thicker insulation means windings are further away from each other. This changes the pickups capacitance and to an extent inductance and dc resistance. Remember, we’re multiplying small differences by how many turns there are, in this case over 10,000.
It appears this coil failed due to corrosion of the magnetic pole

You can see the corrosion in this pic.
In the 70’s Fender pickups were potted in lacquer rather than wax in both earlier and later periods. The lacquer didn’t penetrate all the way to the core of the pickup and this is the result.
Before I re-wound this coil it was rust proofed and insulated – I want this repair to outlive me.
Enjoy this? You may also like…